
How to Create a Waitlist for your New Offer
Are you planning on offering a new course or program?
Are you clients eagerly awaiting for the doors to open?
If so then you need a waitlist!
Waitlists are a great way to generate interest and excitement prior to launching your course or program. A waitlist collects people's details and then they can be the first to hear when the doors open. Hopefully this will also mean that they will purchase right away.
Here are the steps for creating a Waitlist
1. Create a Waitlist Page on a new Landing Page
I recommend creating a new page on your website for your landing page. This way you can easily link to it from several different places - for example in emails, navigation or announcement bar, social media posts etc. You also want it to be found easily and not tucked away on another landing page somewhere.
This landing page can act like a small snapshot of your sales page to entice your audience to join the waitlist and be the first to hear when the doors are open to your new offer.
Building a new landing page for your waitlist means that you can brand it and include lots or a little information about your new offer coming up. The goal being to collect email addresses of those people are very keen to join your program or sign up for your course.
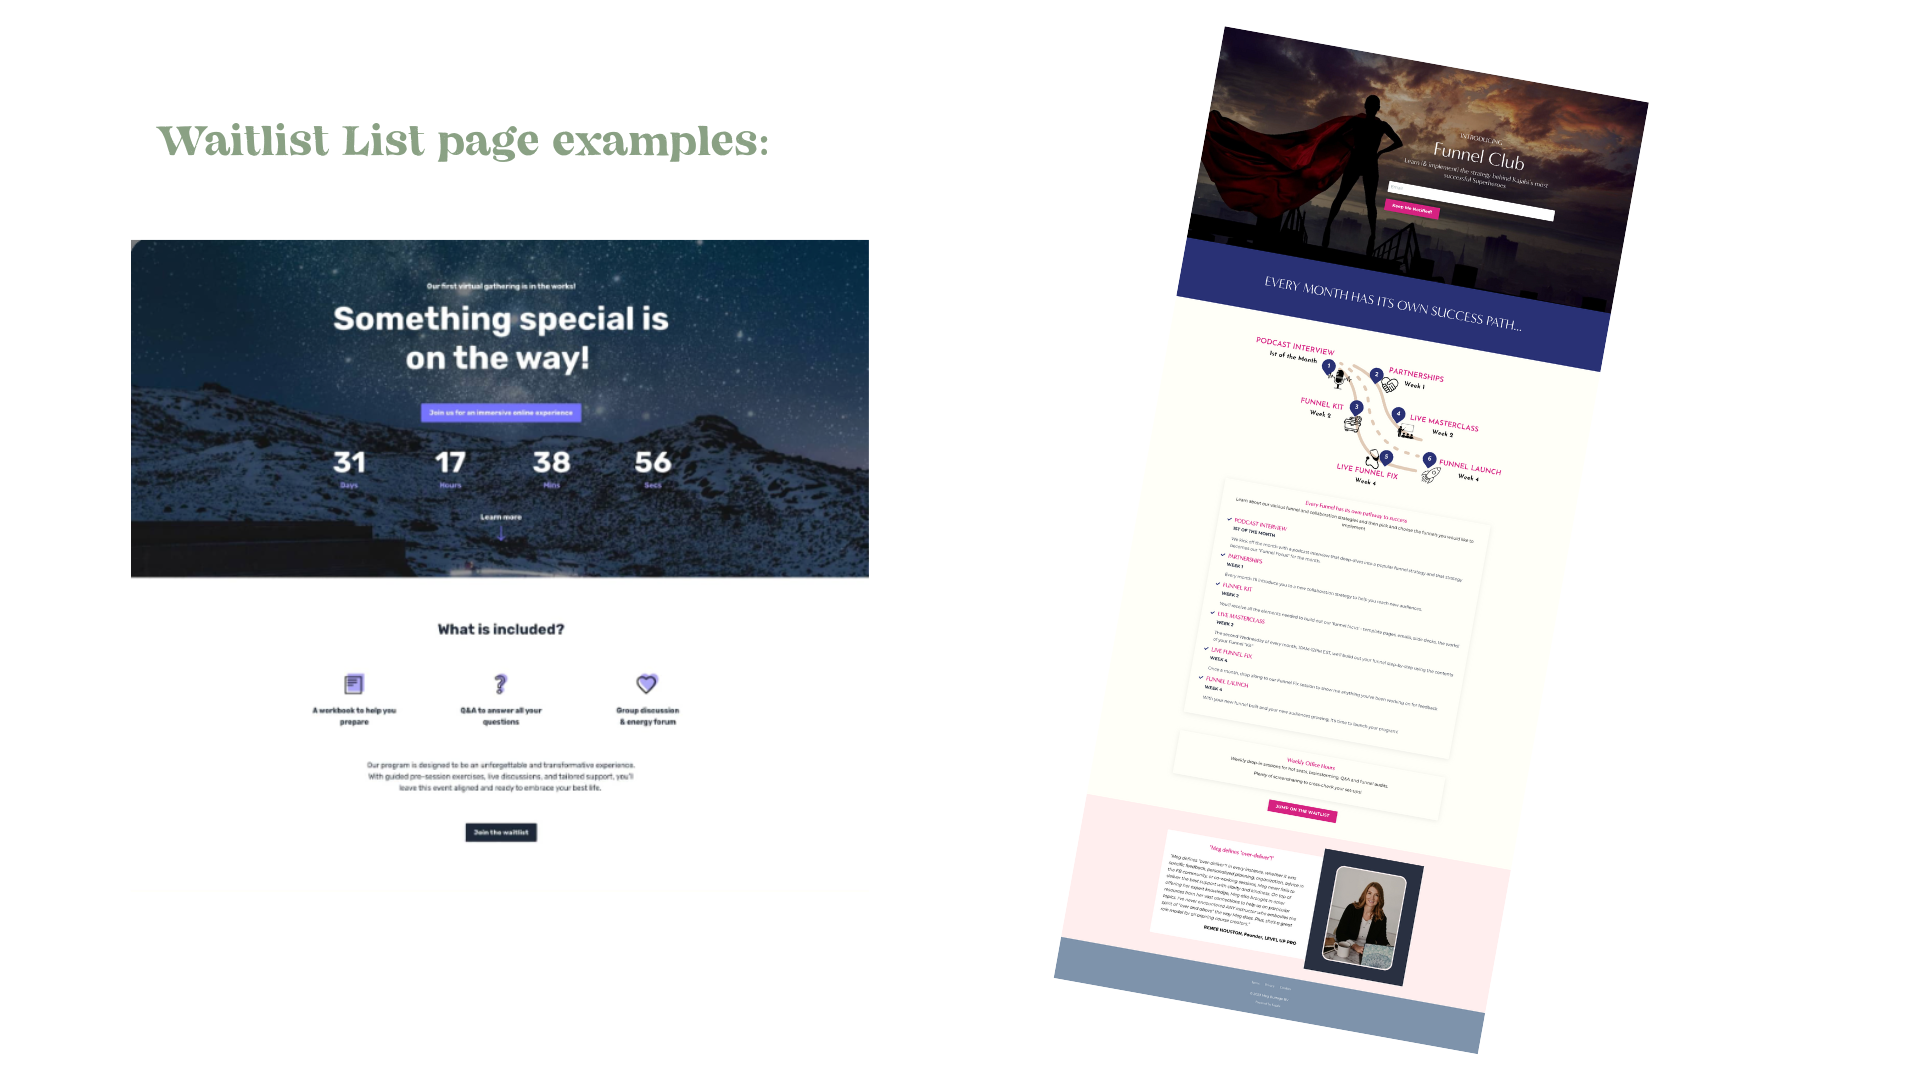
Above is an example of a short and simple waitlist page showing a countdown timer, a few key features of the program and a 'call to action' button taking them to the waitlist form. The second example (created by my mentor Meg Burrage) is a longer form waitlist page with more in-depth information about the program and a testimonial. So you can see that there really is no limit to how you create this page!
Key Features of a Waitlist Page
Heading: You want to catch your audience's attention quickly. There are several ways to do this. One way is to ask questions. Questions that, if they answer yes to, will mean that they want what you are offering and want to be informed when the doors open.
Here's a great example from James Wedmore:

He asks: "Are you ready to finally step into the role your business needs?" And if you answer yes then you read further and see that you can be the 'first' to hear when his signature program is launching.
So if you like this strategy, ask yourself....'what does your audience want, that your course or program can offer?' They won't think twice about joining your waitlist if the answer is yes!
Course/Program Name: make sure that you have branded this page and included the course or program name. When you send them more information later you want them to remember why they signed up for it and to recognise the brand,
Description of the new offer: something short and sweet here so they know what they're signing up for.
Countdown timer (optional): this isn't necessary but if you want to create more anticipation you could include a countdown timer to when the doors are open. This requires creating an 'event' if you're using Kajabi.
Call to Action button: this button links to your form to collect the name and email address.
Form: probably unnecessary to mention - but you need to set up a form to collect the information and store it in your database - you can have this embedded directly on the page or linked via the call-to-action button.
2. Create a Thank You / Confirmation Page
Once they have filled out the form and submitted their details they should be taken to a 'thank you/ confirmation' page. This is another simple landing page just confirming that they are on the list and thanking them for their interest. Again, make sure this is branded. Adding gifs or even a short video is also effective here. You may also want to include a button that takes them back to your home page or 'work with me' page so that you keep them looking at your site.
3. Follow-Up Email
Within the form make sure that you've added a 'tag' so that you can segment those people who joined your waitlist and then send them some emails once your program or course is ready to sell.
I would also recommend setting up an automation to send them a quick 'thank you' email after they have joined your waitlist. Again this keeps you in mind and is a nice follow up. You may want to offer them an opt in gift here too! Or direct them to your lead magnet if you have one already set up.
So you can see there are a few steps to creating your waitlist page and thank you page.
But you now have the tools and info to create your own!
If you still need some help in linking this all together or designing the pages please reach out.
Hey!


